What/who is Rapid Designs?
Hello!
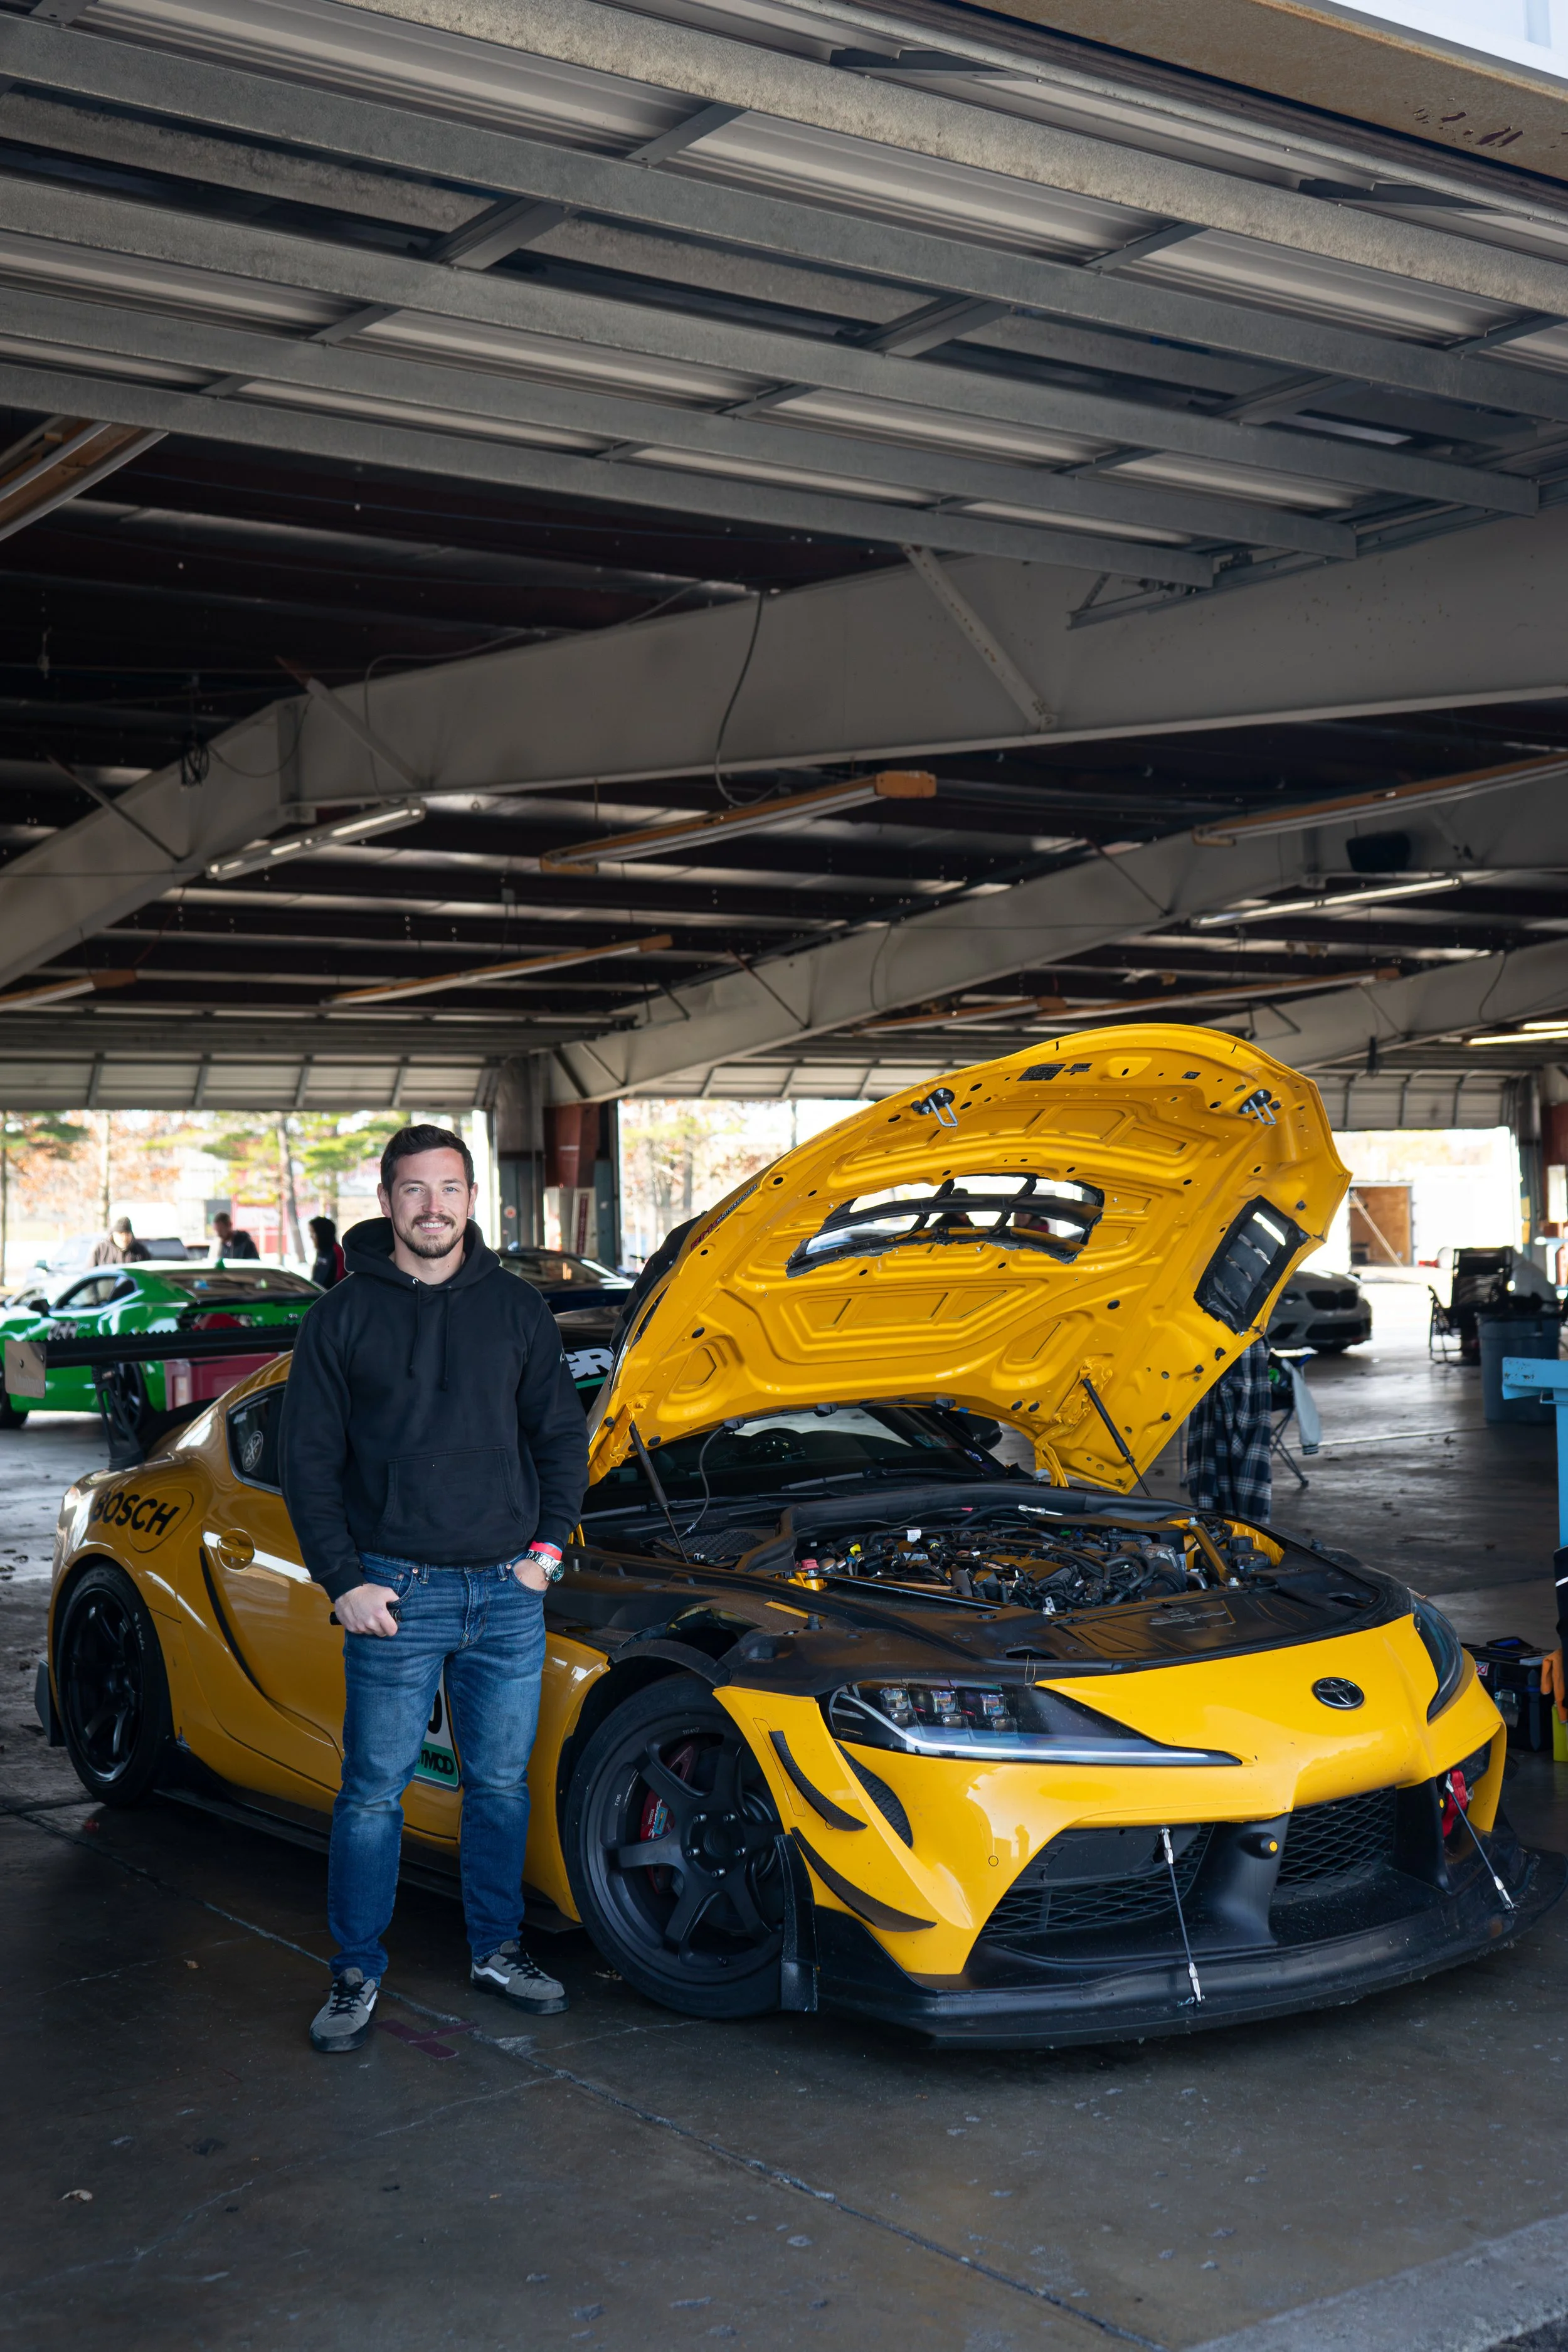
My name is Evan, Rapid Designs is an entity created to represent my designs, mindset, and capabilities within the design space for a myriad of outlets.
I primarily focus on the performance automotive aftermarket space with numerous designs for a range of chassis including Mazda Miata (MX-5)s, Toyota Supras, Honda S2000s, Honda CRXs, and others. These components serve purposes such as aerodynamic tools, ergonomic aids, heat extraction, and cosmetics.
I began this journey in mid 2020 when I purchased my first 3D printer, an Ender 5+. I quickly realized the limitless capabilities I had at my fingertips, but prior to reaching these I needed to climb the steep learning curve of CAD, 3D modelling, FDM printing, material science, and engineering practices. Without prior engineering experience (despite a handful of college classes), all of these skills were self-taught through trial and error, reading, testing, and support from friends and family.
As I was developing these skill sets, I started to see the ways I could integrate my new-found hobby with my existing love, cars. Printing body panels for improved aerodynamics and cosmetics, shift knobs for better ergonomics, and the like quickly became an obsession. My first foray into combining these hobbies happened to be in collaboration with Flyin’ Miata, a leading retailer for OEM and aftermarket parts for the Mazda Miata community in the US. It’s with their help that I was able to realize the marriage of these hobbies with my first ever design, the antenna delete. With some guidance from Flyin’ Miata, the antenna delete proved to be a popular product and is still listed for sale on their website! Although it might not be the flashiest, most in-depth design, its something I am dearly proud of. Check it out for yourself here
Since the Antenna Delete, the chassis that’s received the most focus is the 2019+ Toyota A90 Supra. I currently compete in local “Time Trial” series with the SCCA in the Ohio/PA region with my own A90 Supra that utilizes numerous parts designed by myself. Through competition I test and iterate on my designs for others to use on their own cars.
Automotive
Below comprises my design work within the performance automotive aftermarket space through aerodynamic components, ergonomic aids, and cosmetic parts.

I took a design meant for a 1/10 scale A90 Supra model car and modified it to work with the full-size car including all of the necessary mounting holes. After a test fit, I used the printed part as a plug for a fiberglass mold and pulled a fiberglass lip from the mold. The lip survived on my car for a while until a failed rivnut caused it to break during a track day.
Protect your differential bushings, improve throttle response, and reduce wheel hop
…all in less time than it takes to jack up your car!
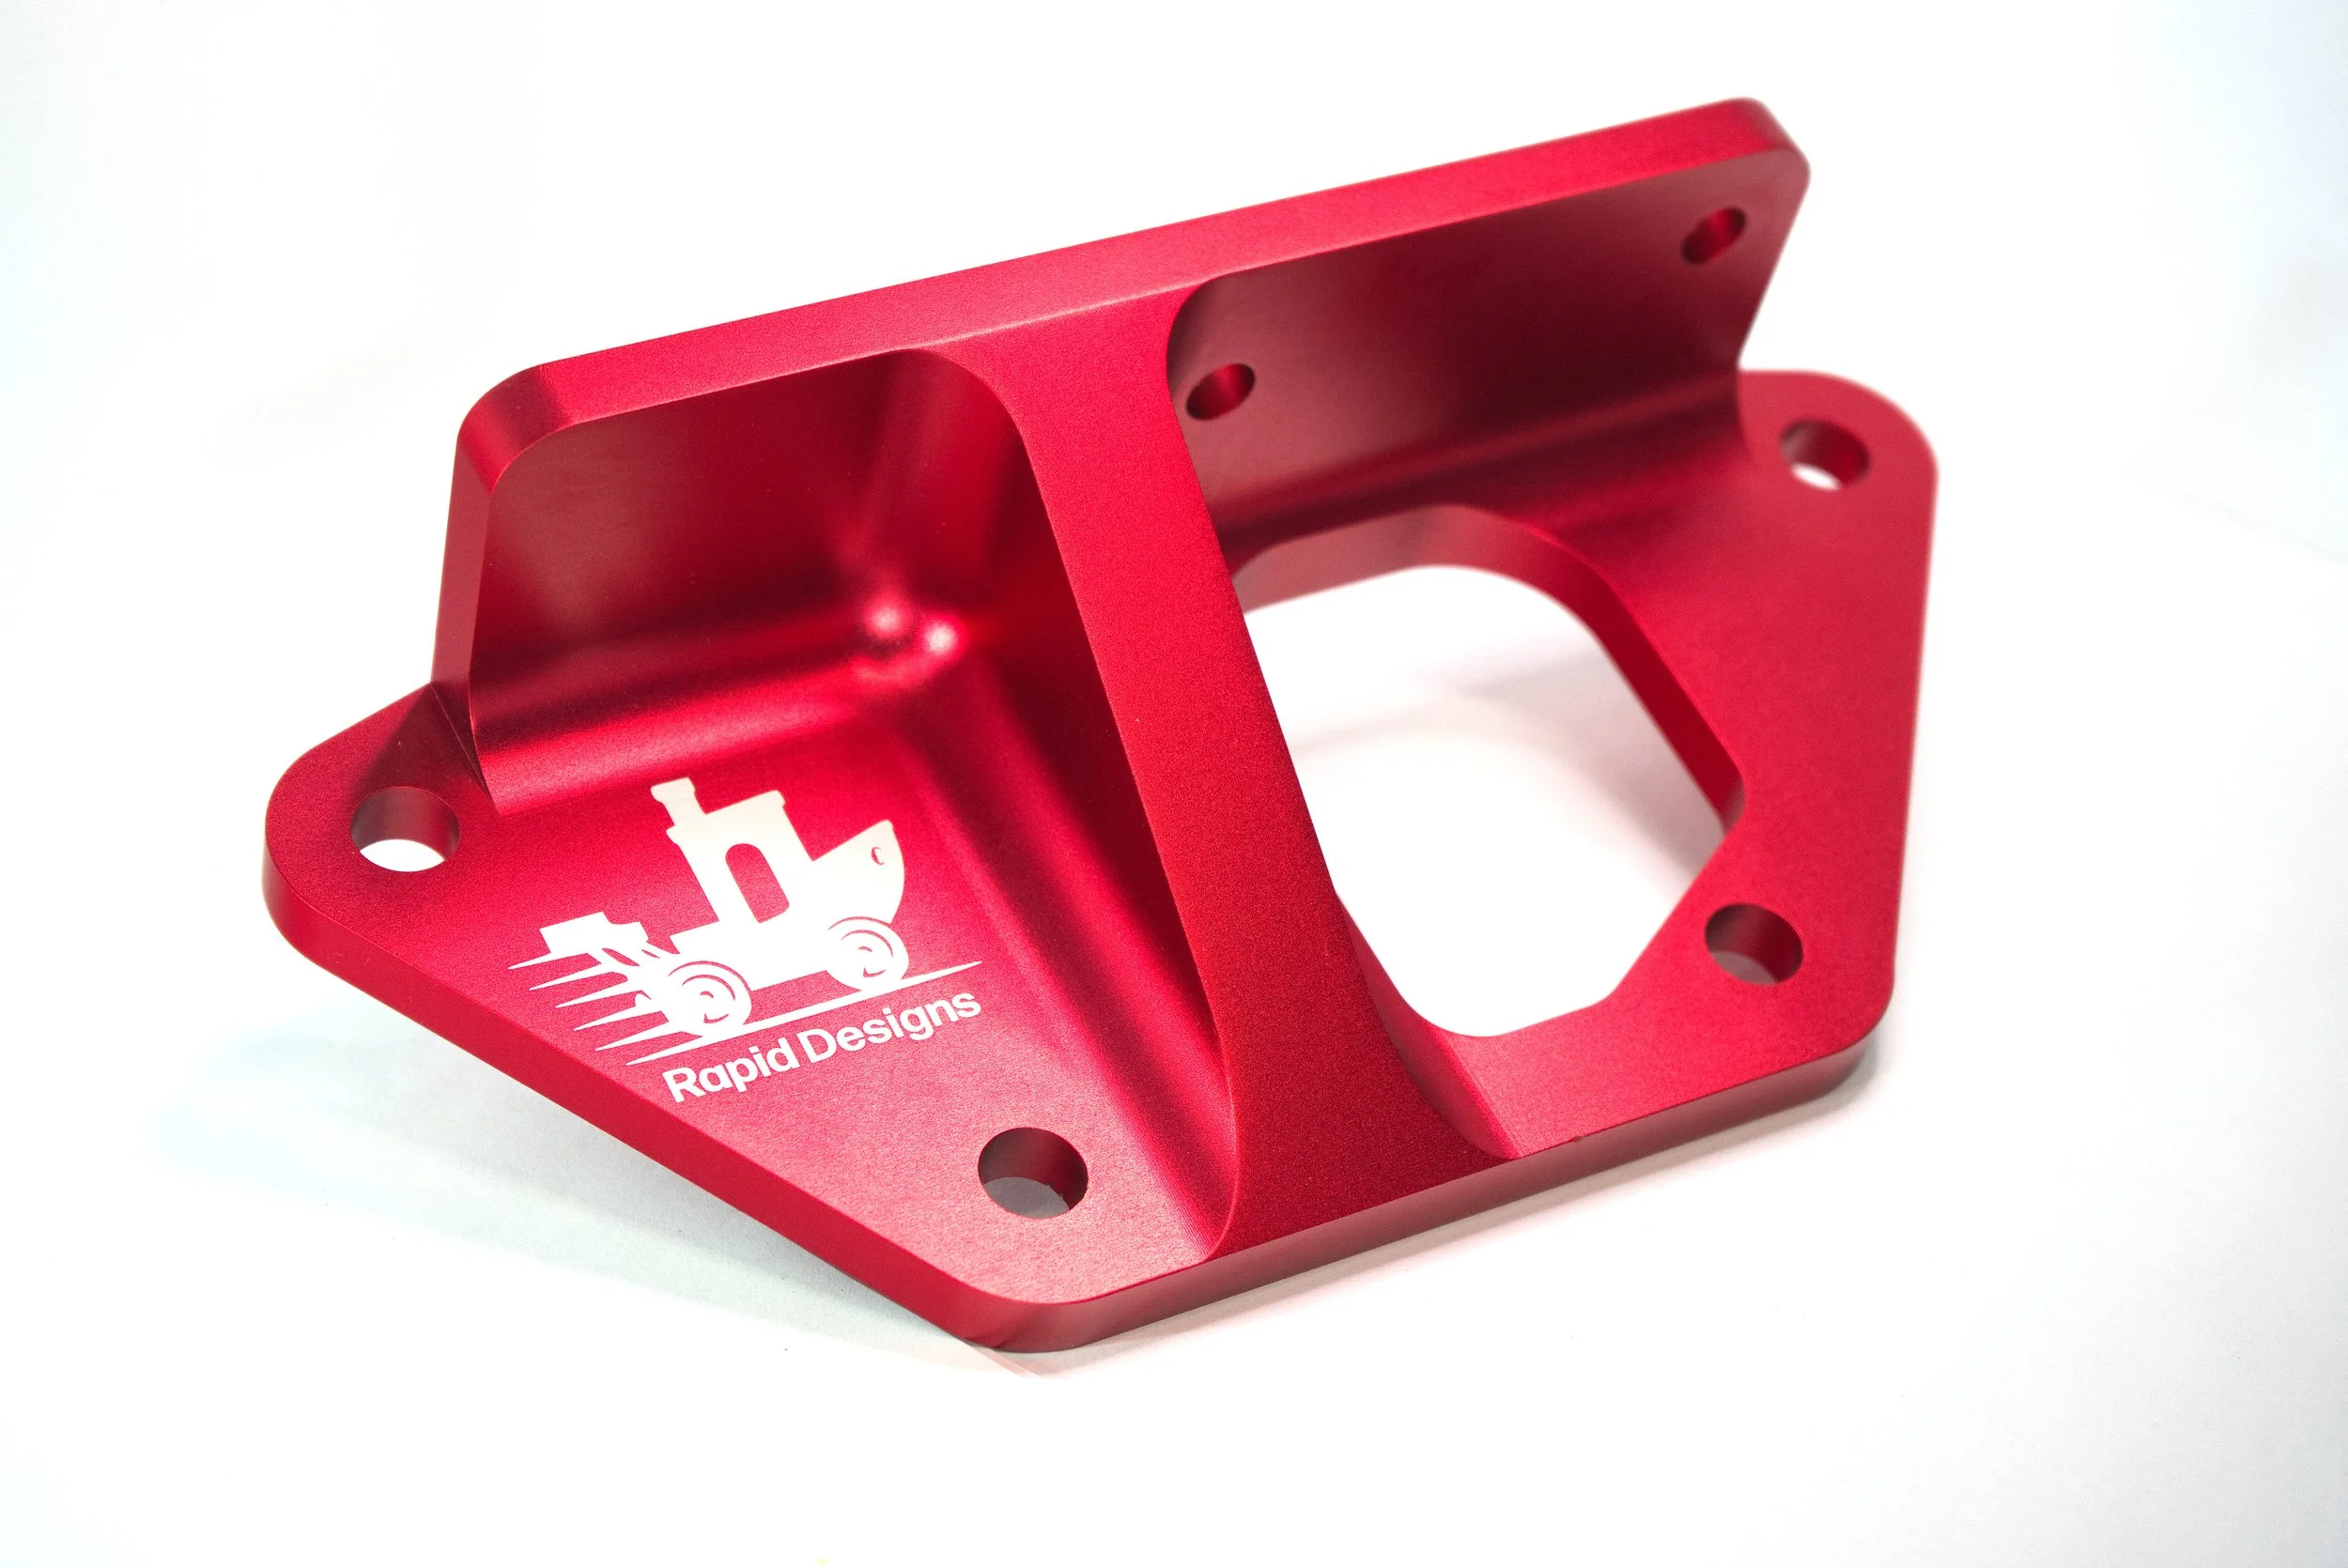
A differential brace aids the OEM diff bushings by preventing movement under heavy load whether that be during launches or track driving.
Most braces on the market block access to the diff drain plug and sensor, which proves to be quite a pain for as the differential fluid should be changed somewhat regularly based on usage.
Additionally, most braces on the market require drilling into the subframe (as all braces interface between the differential case and the subframe) despite there being 2 holes already being present.
The Rapid Designs A90 Supra Differential Brace does the following:
Effectively limits differential movement, reducing wheel hop and potential drivetrain damage
Improved throttle response by reducing drivetrain slack
Allows access to the differential drain plug AND sensor
Utilizes the holes already present in the subframe, NO DRILLING REQUIRED
Blocks a minimal amount of cooling fin surface area to allow the differential to maintain optimal cooling.
Minimal if any increase to NVH
Extremely fast and simple install
Works with Verus Engineering Differential Cooling Scoop with minor modification
5 colors!
"…It took longer to jack the car up than it did to install…”
“Immediately noticed a more responsive rear and takeoff…”
“…You made a better write up than what the big companies put together.”
What's included?
1x - Differential Brace
1x - Subframe insert
2x - M8 × 25mm bolts
4x - M10 × 85mm bolts
2x - M8 wedgelock washers
4x - M10 wedgelock washers
FITMENT:
BOTH Automatic and Manual 3.0 A90 Supra (B58 powered)
BMW G20 M340i / M340i xDrive
BMW G22 M440i
BMW G42 M240i / M240i xDrive
BMW Z4 M40i
See the install guide here:
https://www.rapiddesigns.us/downloads
NOTE: As explained below, you are placing an order as a group-buy, thus shipping times will be longer due to the nature of ordering from my manufacturer, packaging, and fulfillment. Typically ~2 month turnaround time.

Although there are numerous options on the market for A90 Supra hood vents, many owners use a GT4 style hood vent from a couple manufacturers. One has issues with warping (I owned this one myself) while the other works well but is rather small. Rather than spend money to replace my hood vent with one that will inevitably warp again I decided to make my own version in a cost effective manner. This way I could not only solve my own issue but help out the A90 Supra community as a whole.
After some time on CAD I decided the best course of action would be to follow a similar path to other companies and design a thin aluminum louvered design. This way it is cheap to produce and ship, easy to design, is flexible enough to be mounted anywhere the prior vent was, and easily paintable.
NOTE: THIS PRODUCT IS MADE TO ORDER
A response to the current fender vent options on the market that either are extremely expensive for the materials used, take forever to deliver, lack in performance, or have a combination of the three. This vent package prioritizes the user in that installation tools are provided such that the user DOES NOT HAVE TO MEASURE for installation! Simply use the installation tools along with the instructions provided to trace out the area to cut and install. These vents have survived 2 race seasons on my own car being printed out of PETG. Currently multiple users are utilizing these vents with zero issues thus far. Currently, a carbon fiber version is being developed for those who would rather have that material over an FDM print.
NOTE:
Print bed size requirement: 242.25 × 295.362 × 159.05mm
This download includes the files necessary to print a set of fender vents, the cutting tools, and alignment tools.

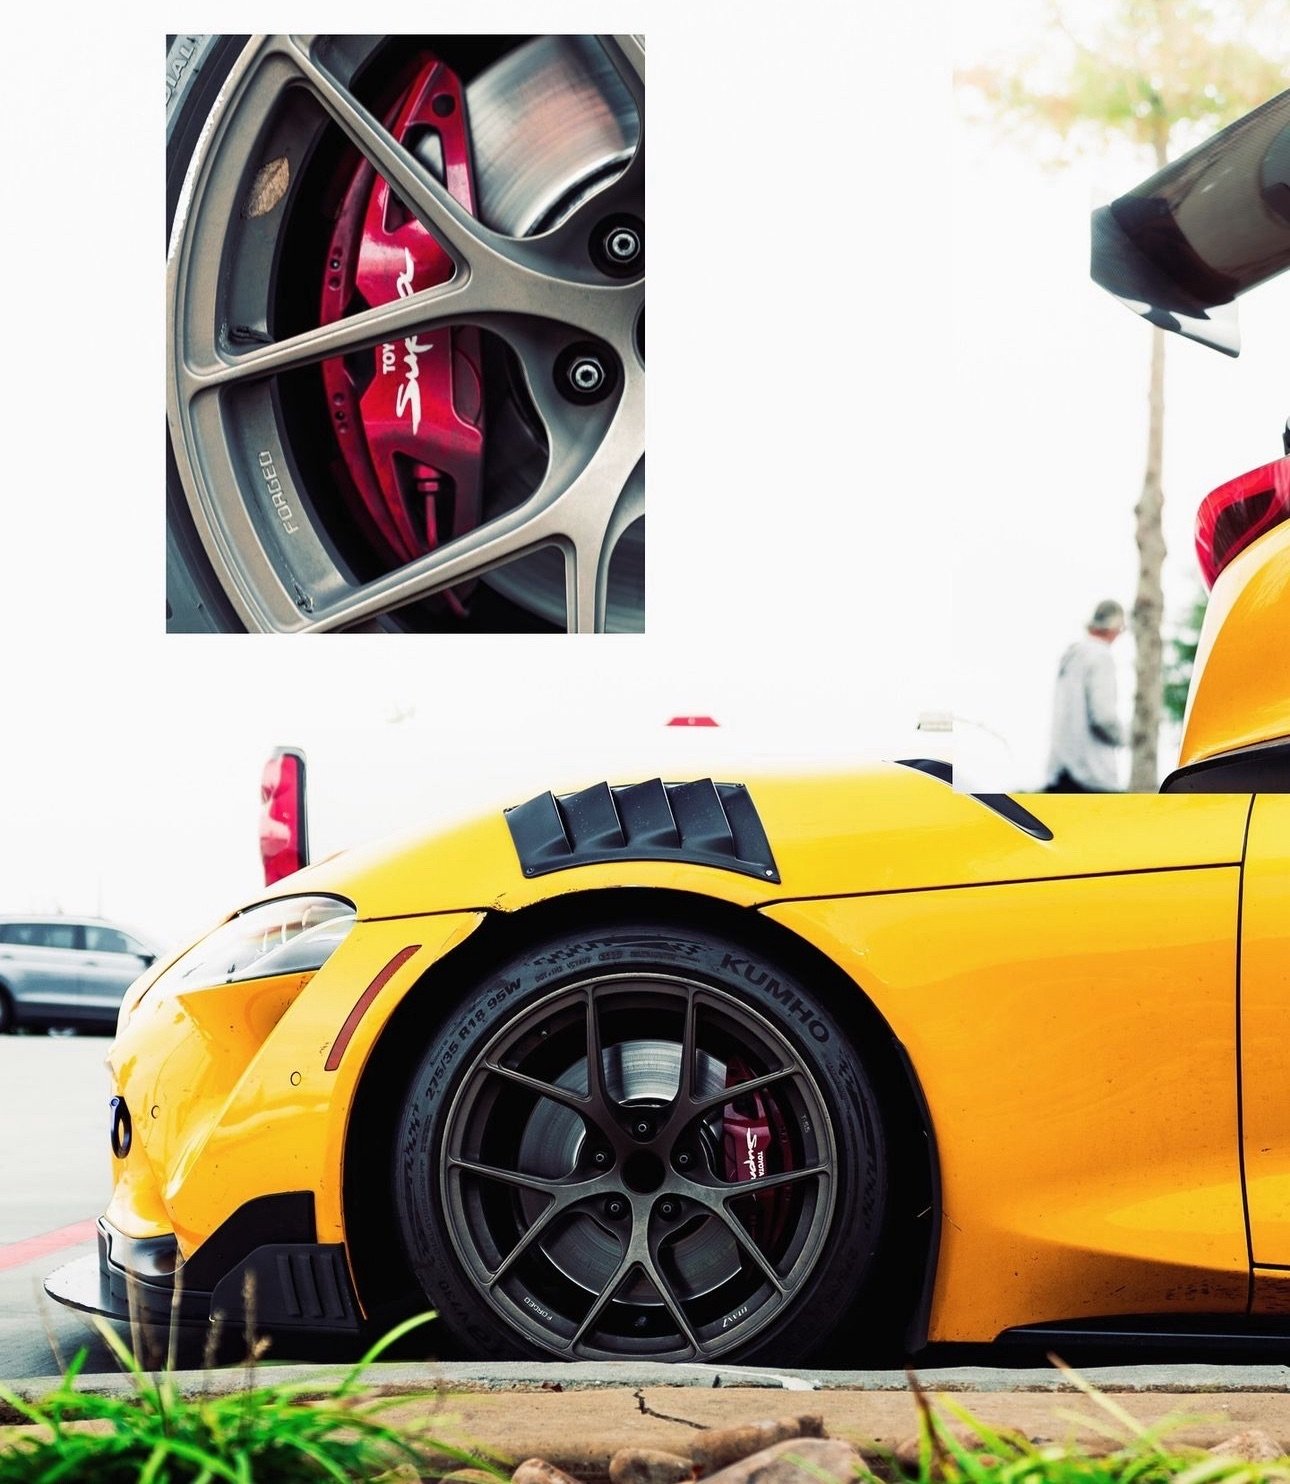
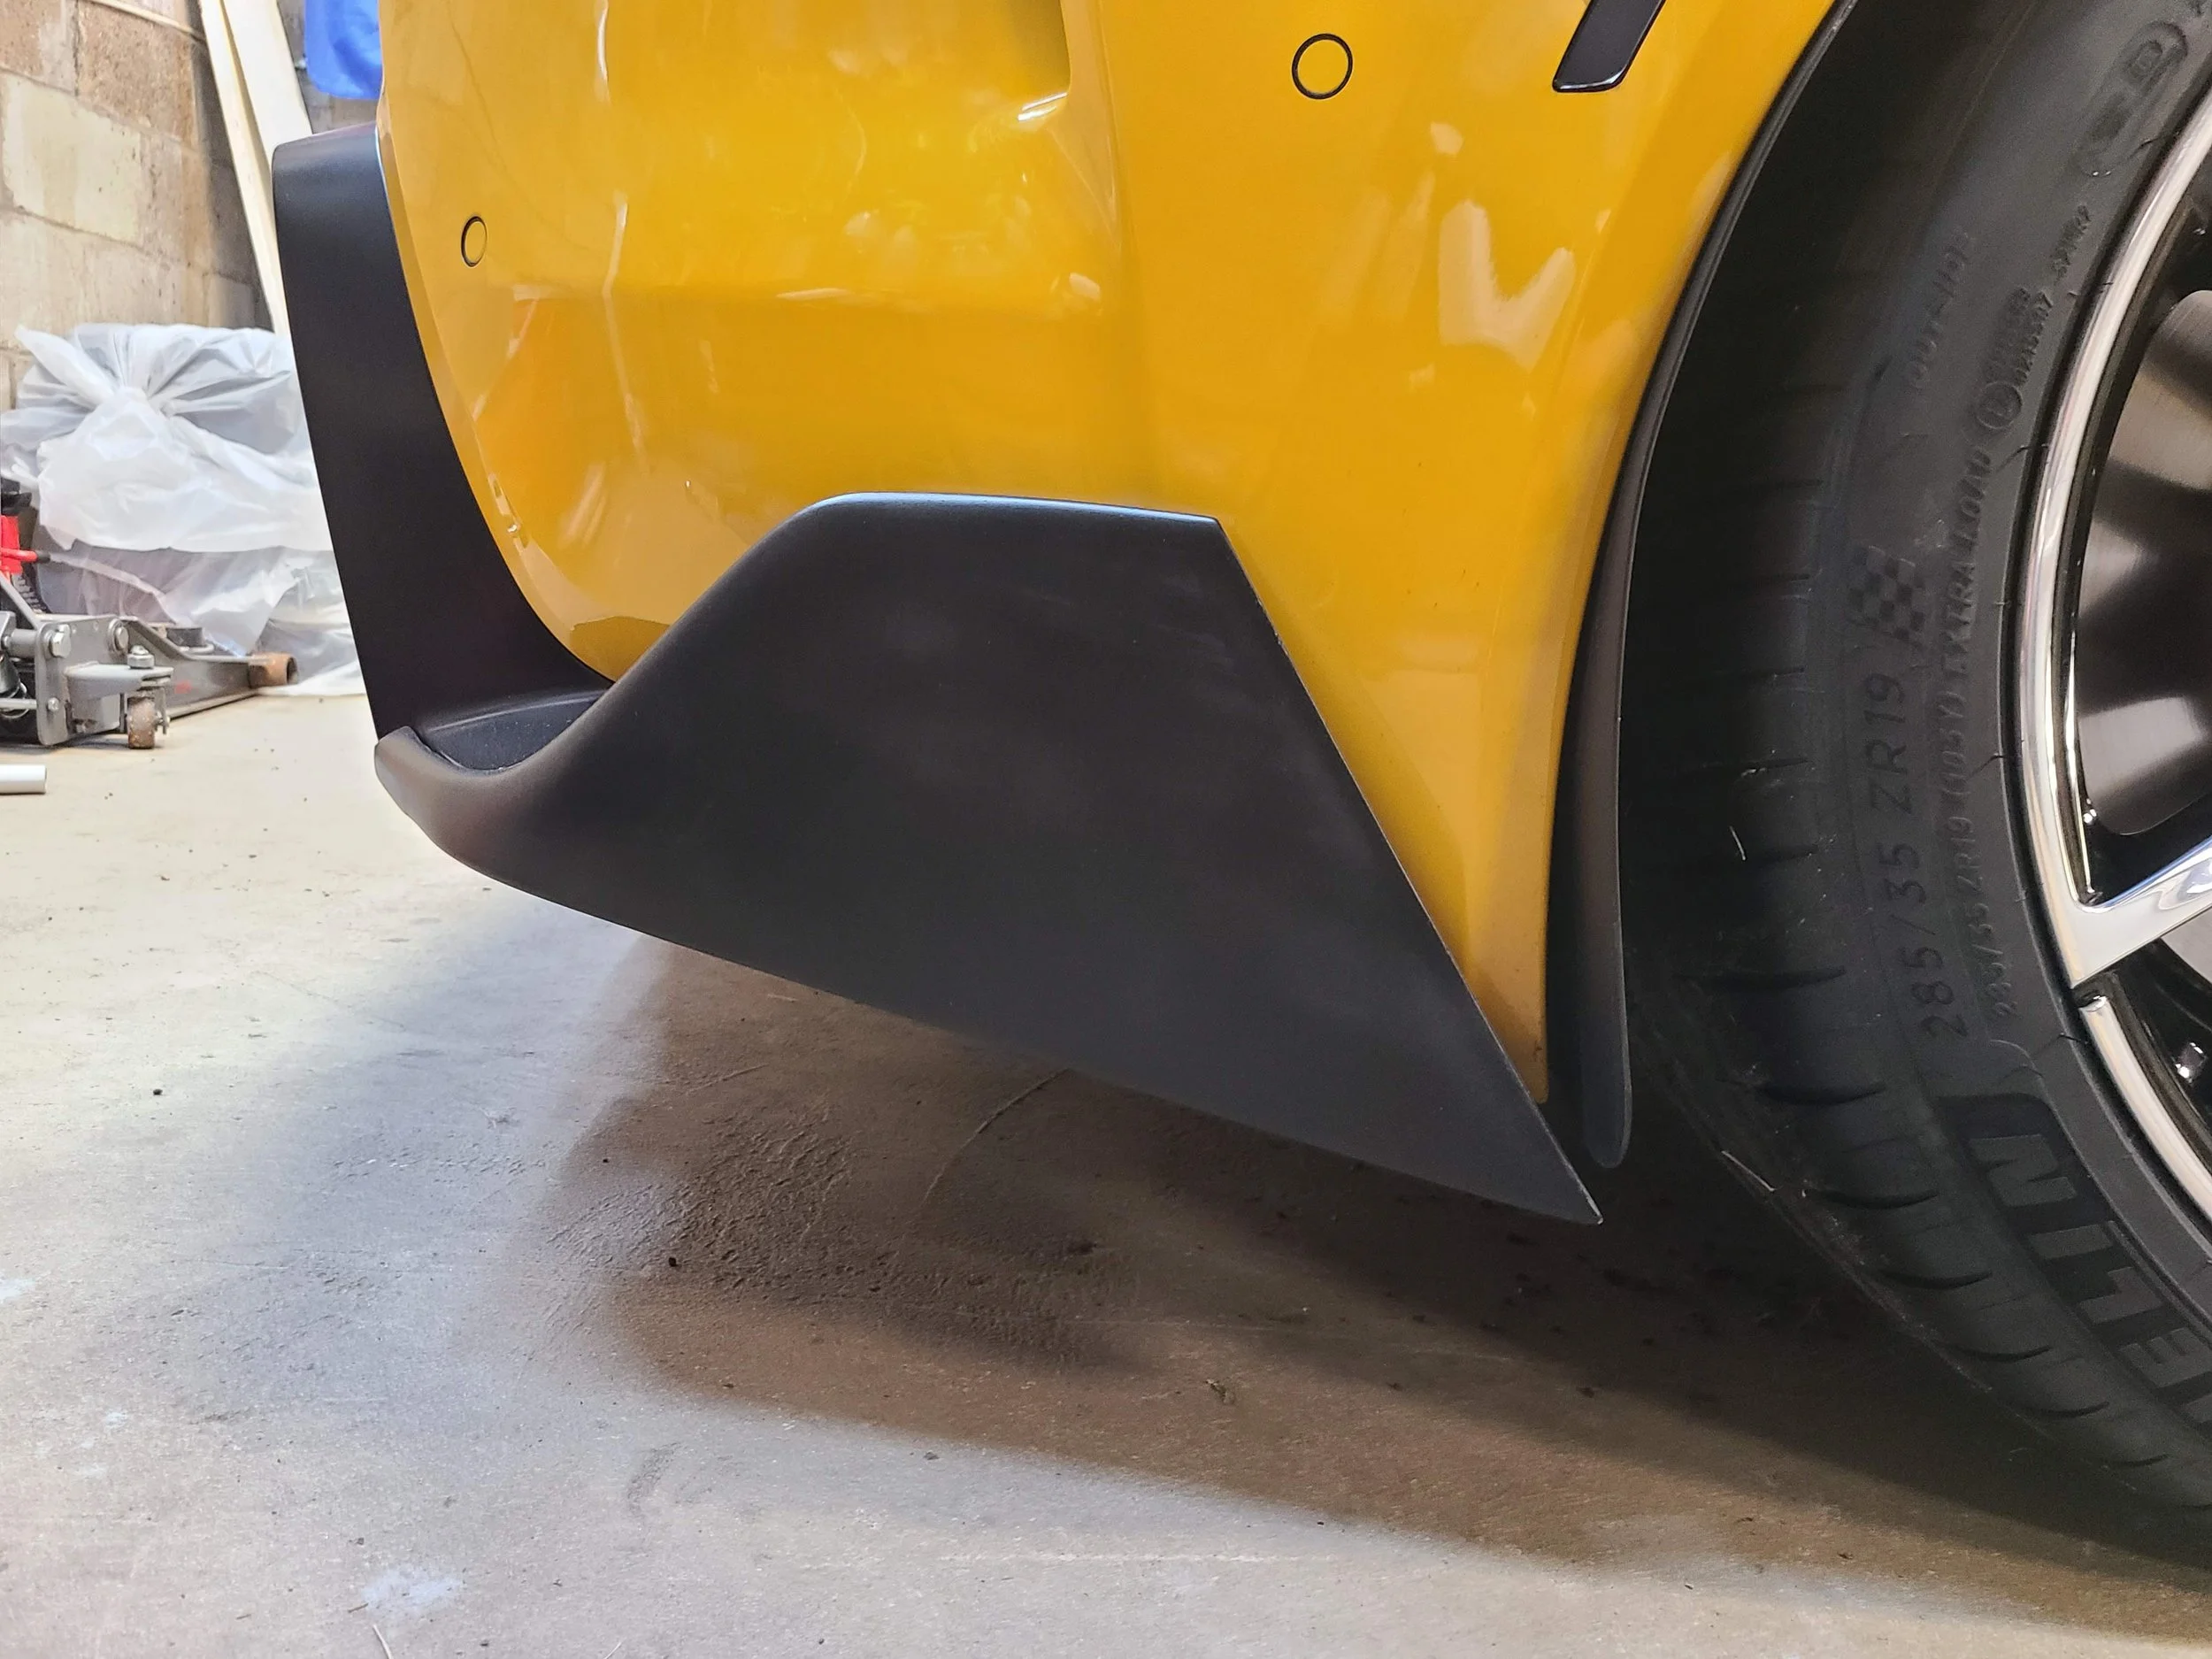
A simple design that blocks the frontal area of the tires for people running a more aggressive setup in the front. Utilizes OEM body geometry to continue natural bodylines and adheres via 3M tape. Designed to work with the Aeroluxe GT4 style front lip but will work with essentially any front splitter. My set has survived 2 years of track abuse printed in PETG
NOTE: The downloaded file includes an STL for a set of front spats, mirror the spat in your slicing software of choice to print the other side.
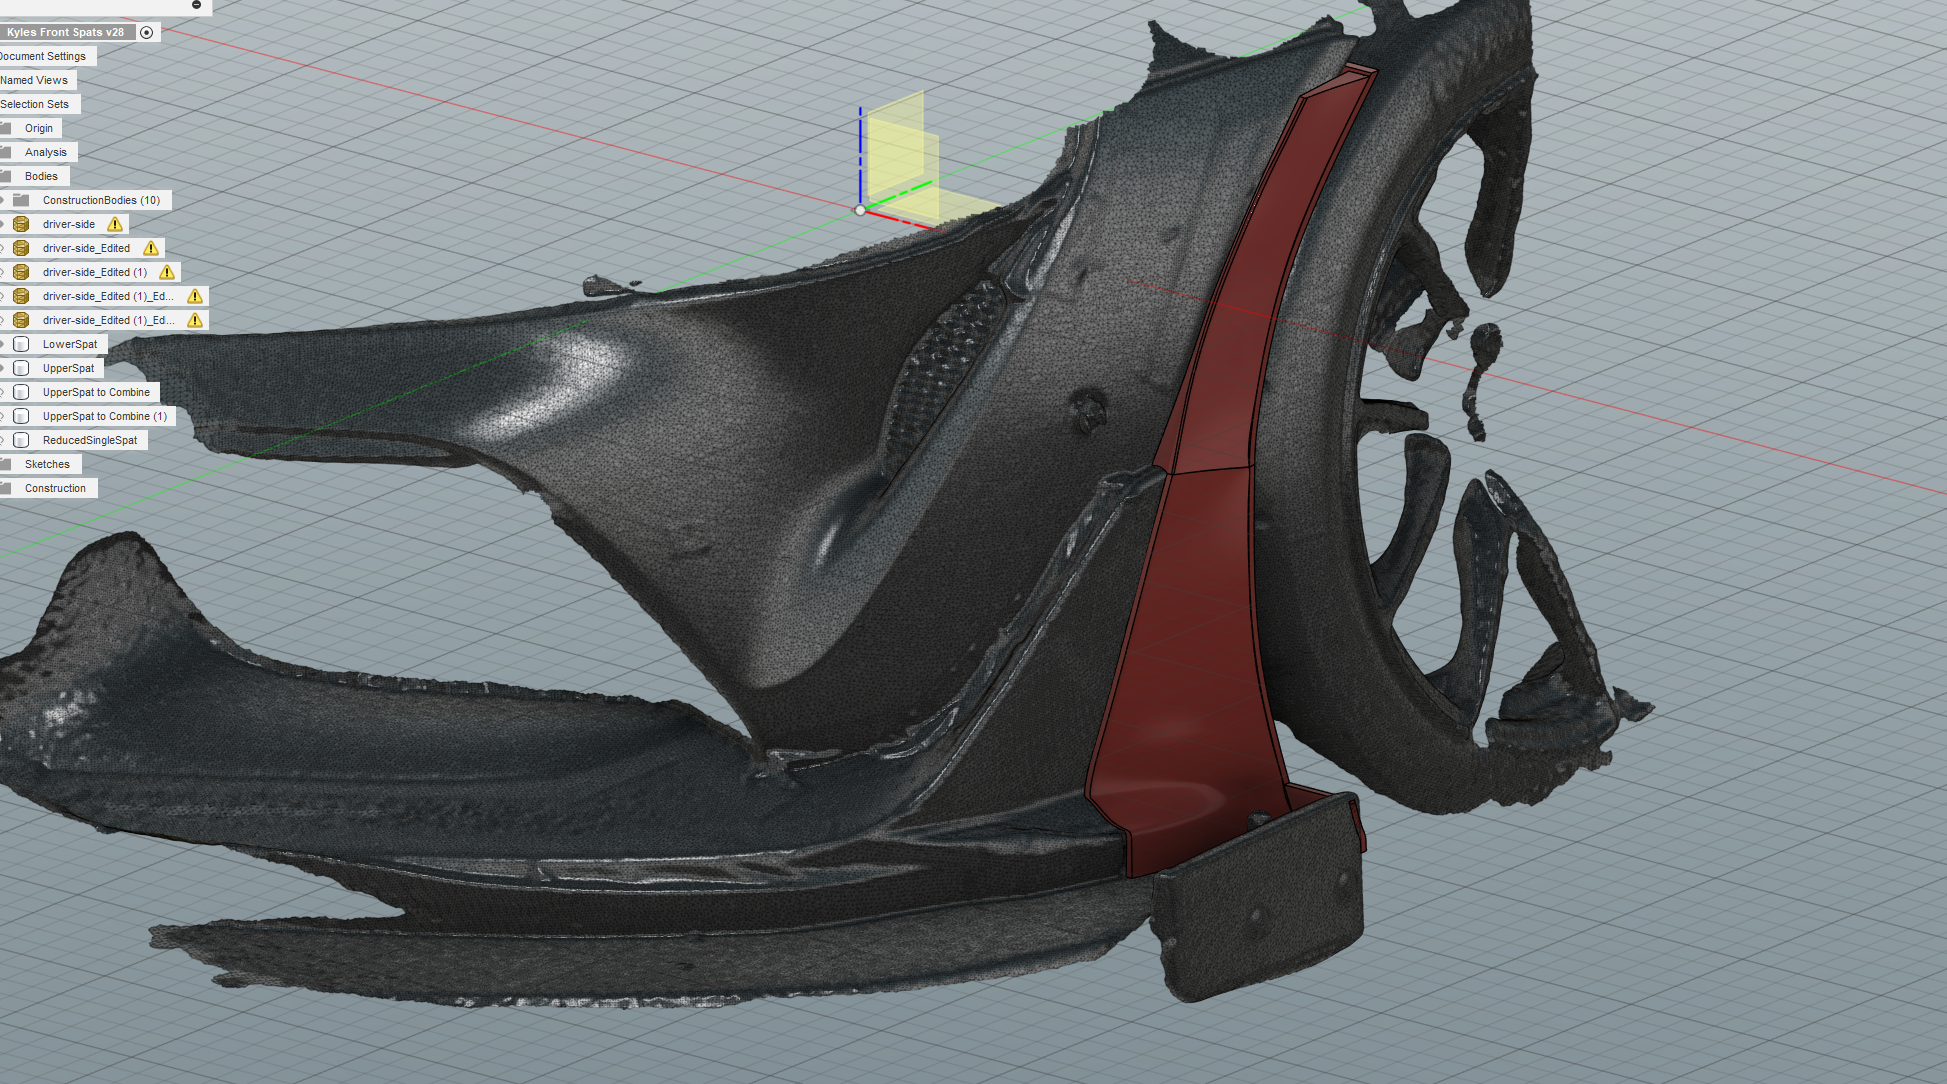
Kyle came to me and asked for a set of front spats for 2 different wheel and tire setups that would not only work with his splitter/CF edition front lip but would also reduce drag compared to the typical flat faced front spat setup. After receiving a scan from him and a couple revisions I was able to produce a package that could be easily applied and removed in addition to being 2 separate parts per side such that it would be easy to replace if need be. The parts were also CFD tested by Verus Engineering and shown to be slightly less draggy compared to their design.

A friend approached me and asked for me to develop a pivoting AiM Dash mount for his e46 m3 race car. After a scan and some dimensions, I was able to design something that would mount to the column itself rather than any flimsy plastic pieces and allowed for pivoting in case the column was moved in any direction.

Due to my shoe size and the spacing of the pedals in my GE8 Honda fit, it was hard for me to heel and toe downshift. After a quick scan and some modelling I was able to design a pedal with an extension that was riveted to the pedal itself and allowed me to roll my foot to blip the accelerator to enable heel-toe downshifting. So far this has been on the car for more than a year with zero issues.

A friend was using an ESP32-based microcontroller to translate ABS values from his MK60 ABS module from K-line to CANBUS in order for his AIM data acquisition system to read it. This board would be in a sensitive environment and needed the ability to disipate shock. To do this I designed an enclosure with a soft TPU insert for the board to sit on such that it would be isolated from vibrations induced by the car.

In preparation for a future fuel system upgrade on my A90 Supra I used a Radium design and modified it slightly to better fit an FDM printing use case.

A friend of mine purchased a celica supra that had some rotting door/rocker trim pieces and was looking for some sort of replacement. Unfortunately the only options were $800 OEM pieces or $500 reproduction parts. I used what was left of her current trim pieces and printed new ones in multiple pieces.

A friend wanted to mount his OBD2 female port in an easier to access location due to his rollcage blocking the usage of the OEM location. To do this I made a simple enclosure to house his female port that would be attached to the rollcage via 3 zipties such that it could be easily removed if need be.

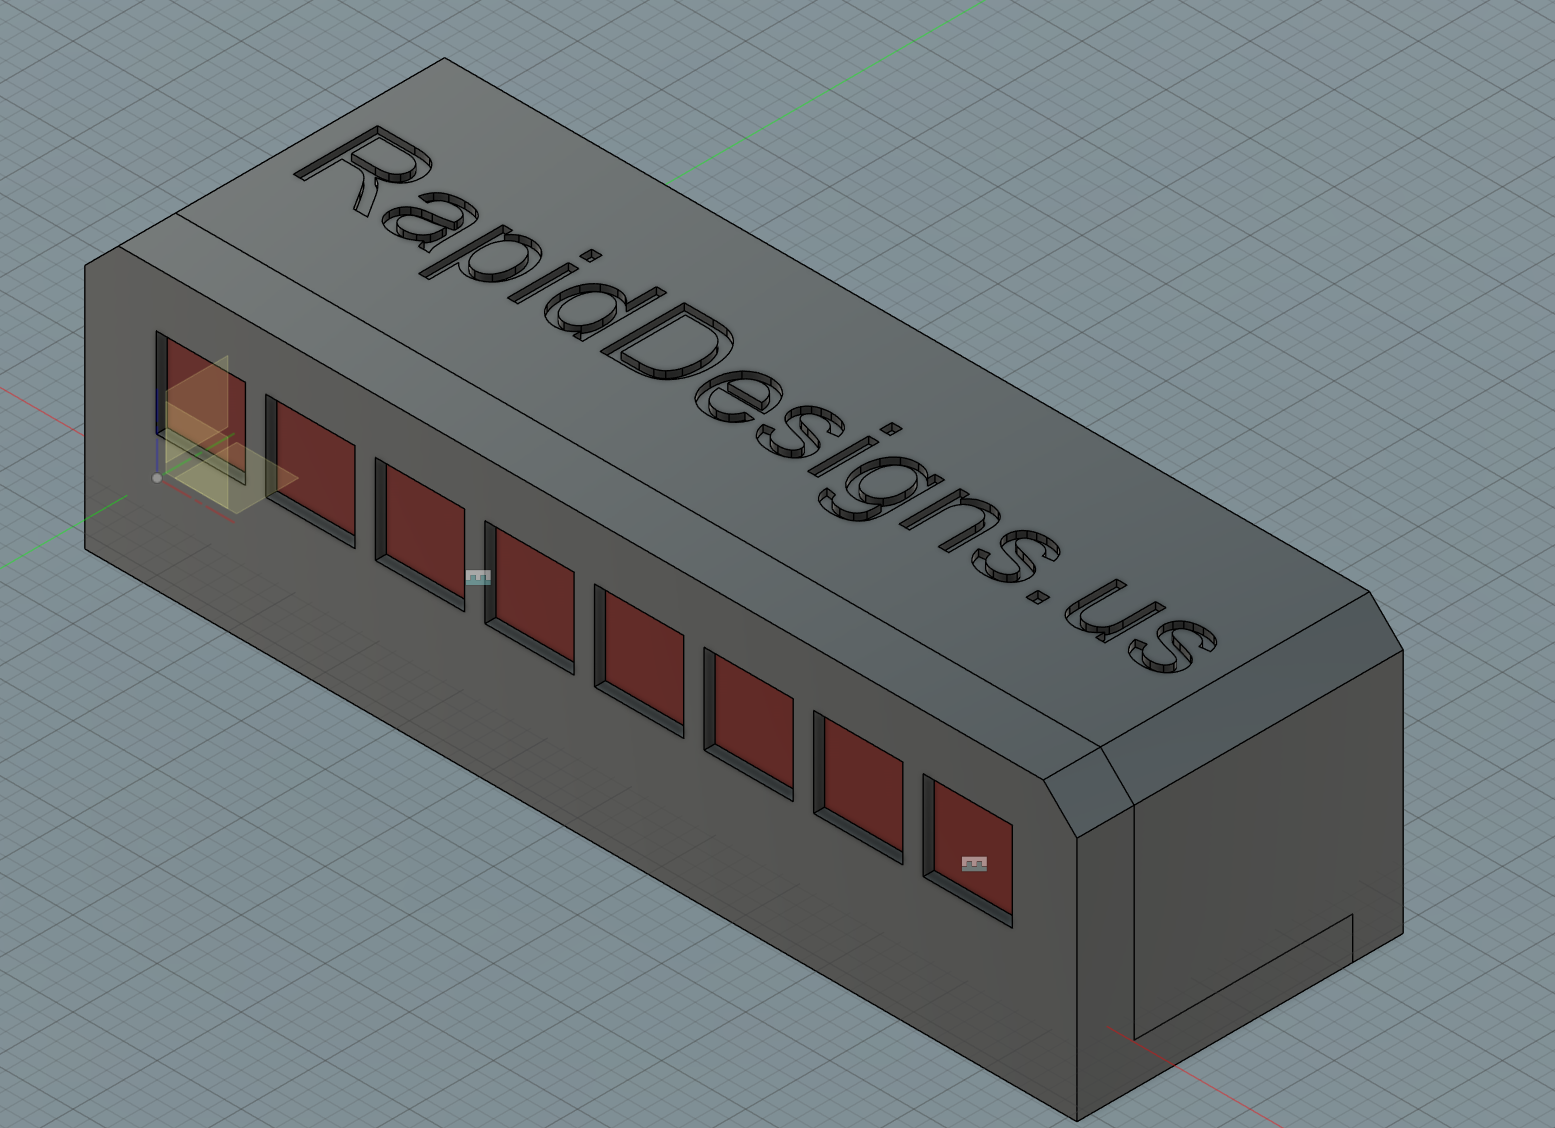
A friend asked me to develop a modular switch panel to replace the sunglasses holder in his overlanding forerunner build. It incoprorates ample room for multiple switches, swappable face plates, and an integrated spot for a down-facing map light.
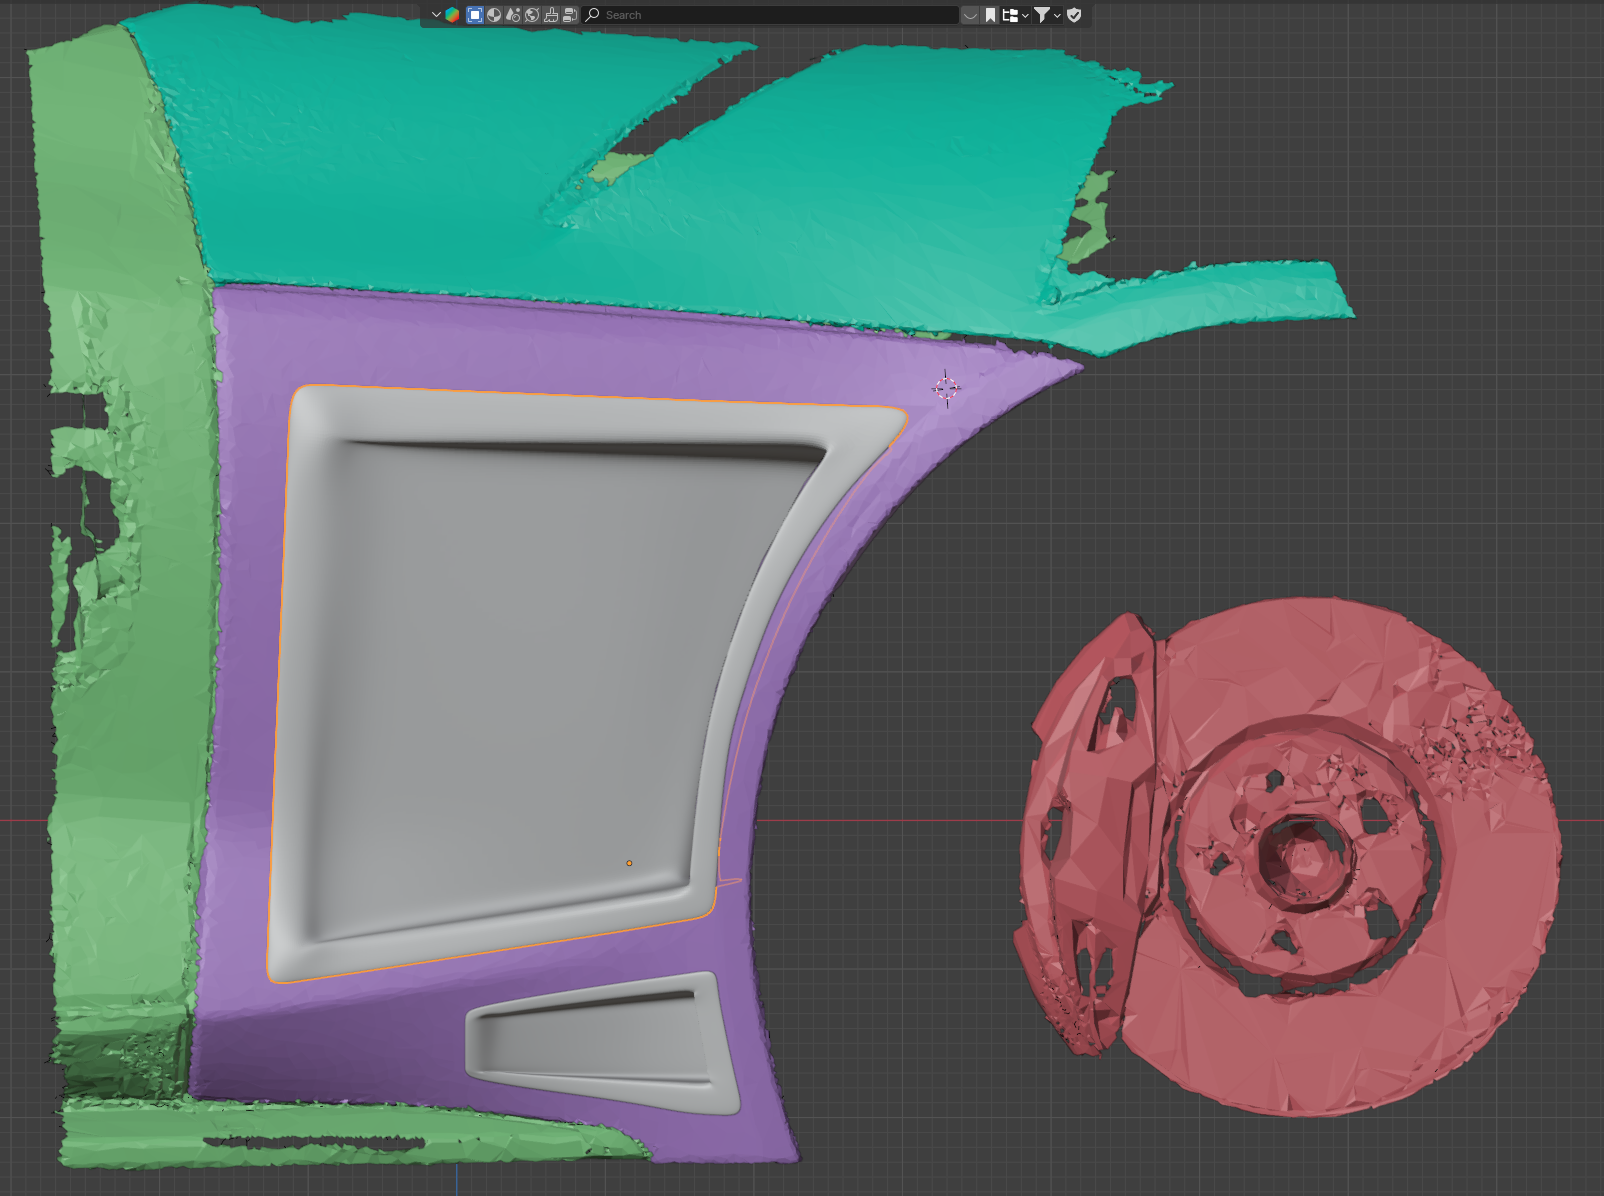
Although there are multiple options on the market for A90 Supra fenders, most dont follow best practices or serve more as a cosmetic part rather than a functional part. Additionally, most of the fenders are carbon or fiberglass which ends up driving up price, increasing fragility, worsening fitment, and in certain instances may even be heavier than the OEM fenders. In addition, the fenders on the market dont reach into the wheel well enough nor do they offer a smooth, radiused exit for the high-pressure air to escape in a more linear manner (as linear as air can get in such a messy spot like a wheel well).
This design hopes to solve all of these issues by utilizing the OEM fender as a base and inserting two vents. The vents are designed to provide a smooth exit while protruding as far inward into the body as possible.
NOTE: THIS FILE IS FOR THE LOWER (SMALLER) VENT AND INLUDES CUTTING TEMPLATE
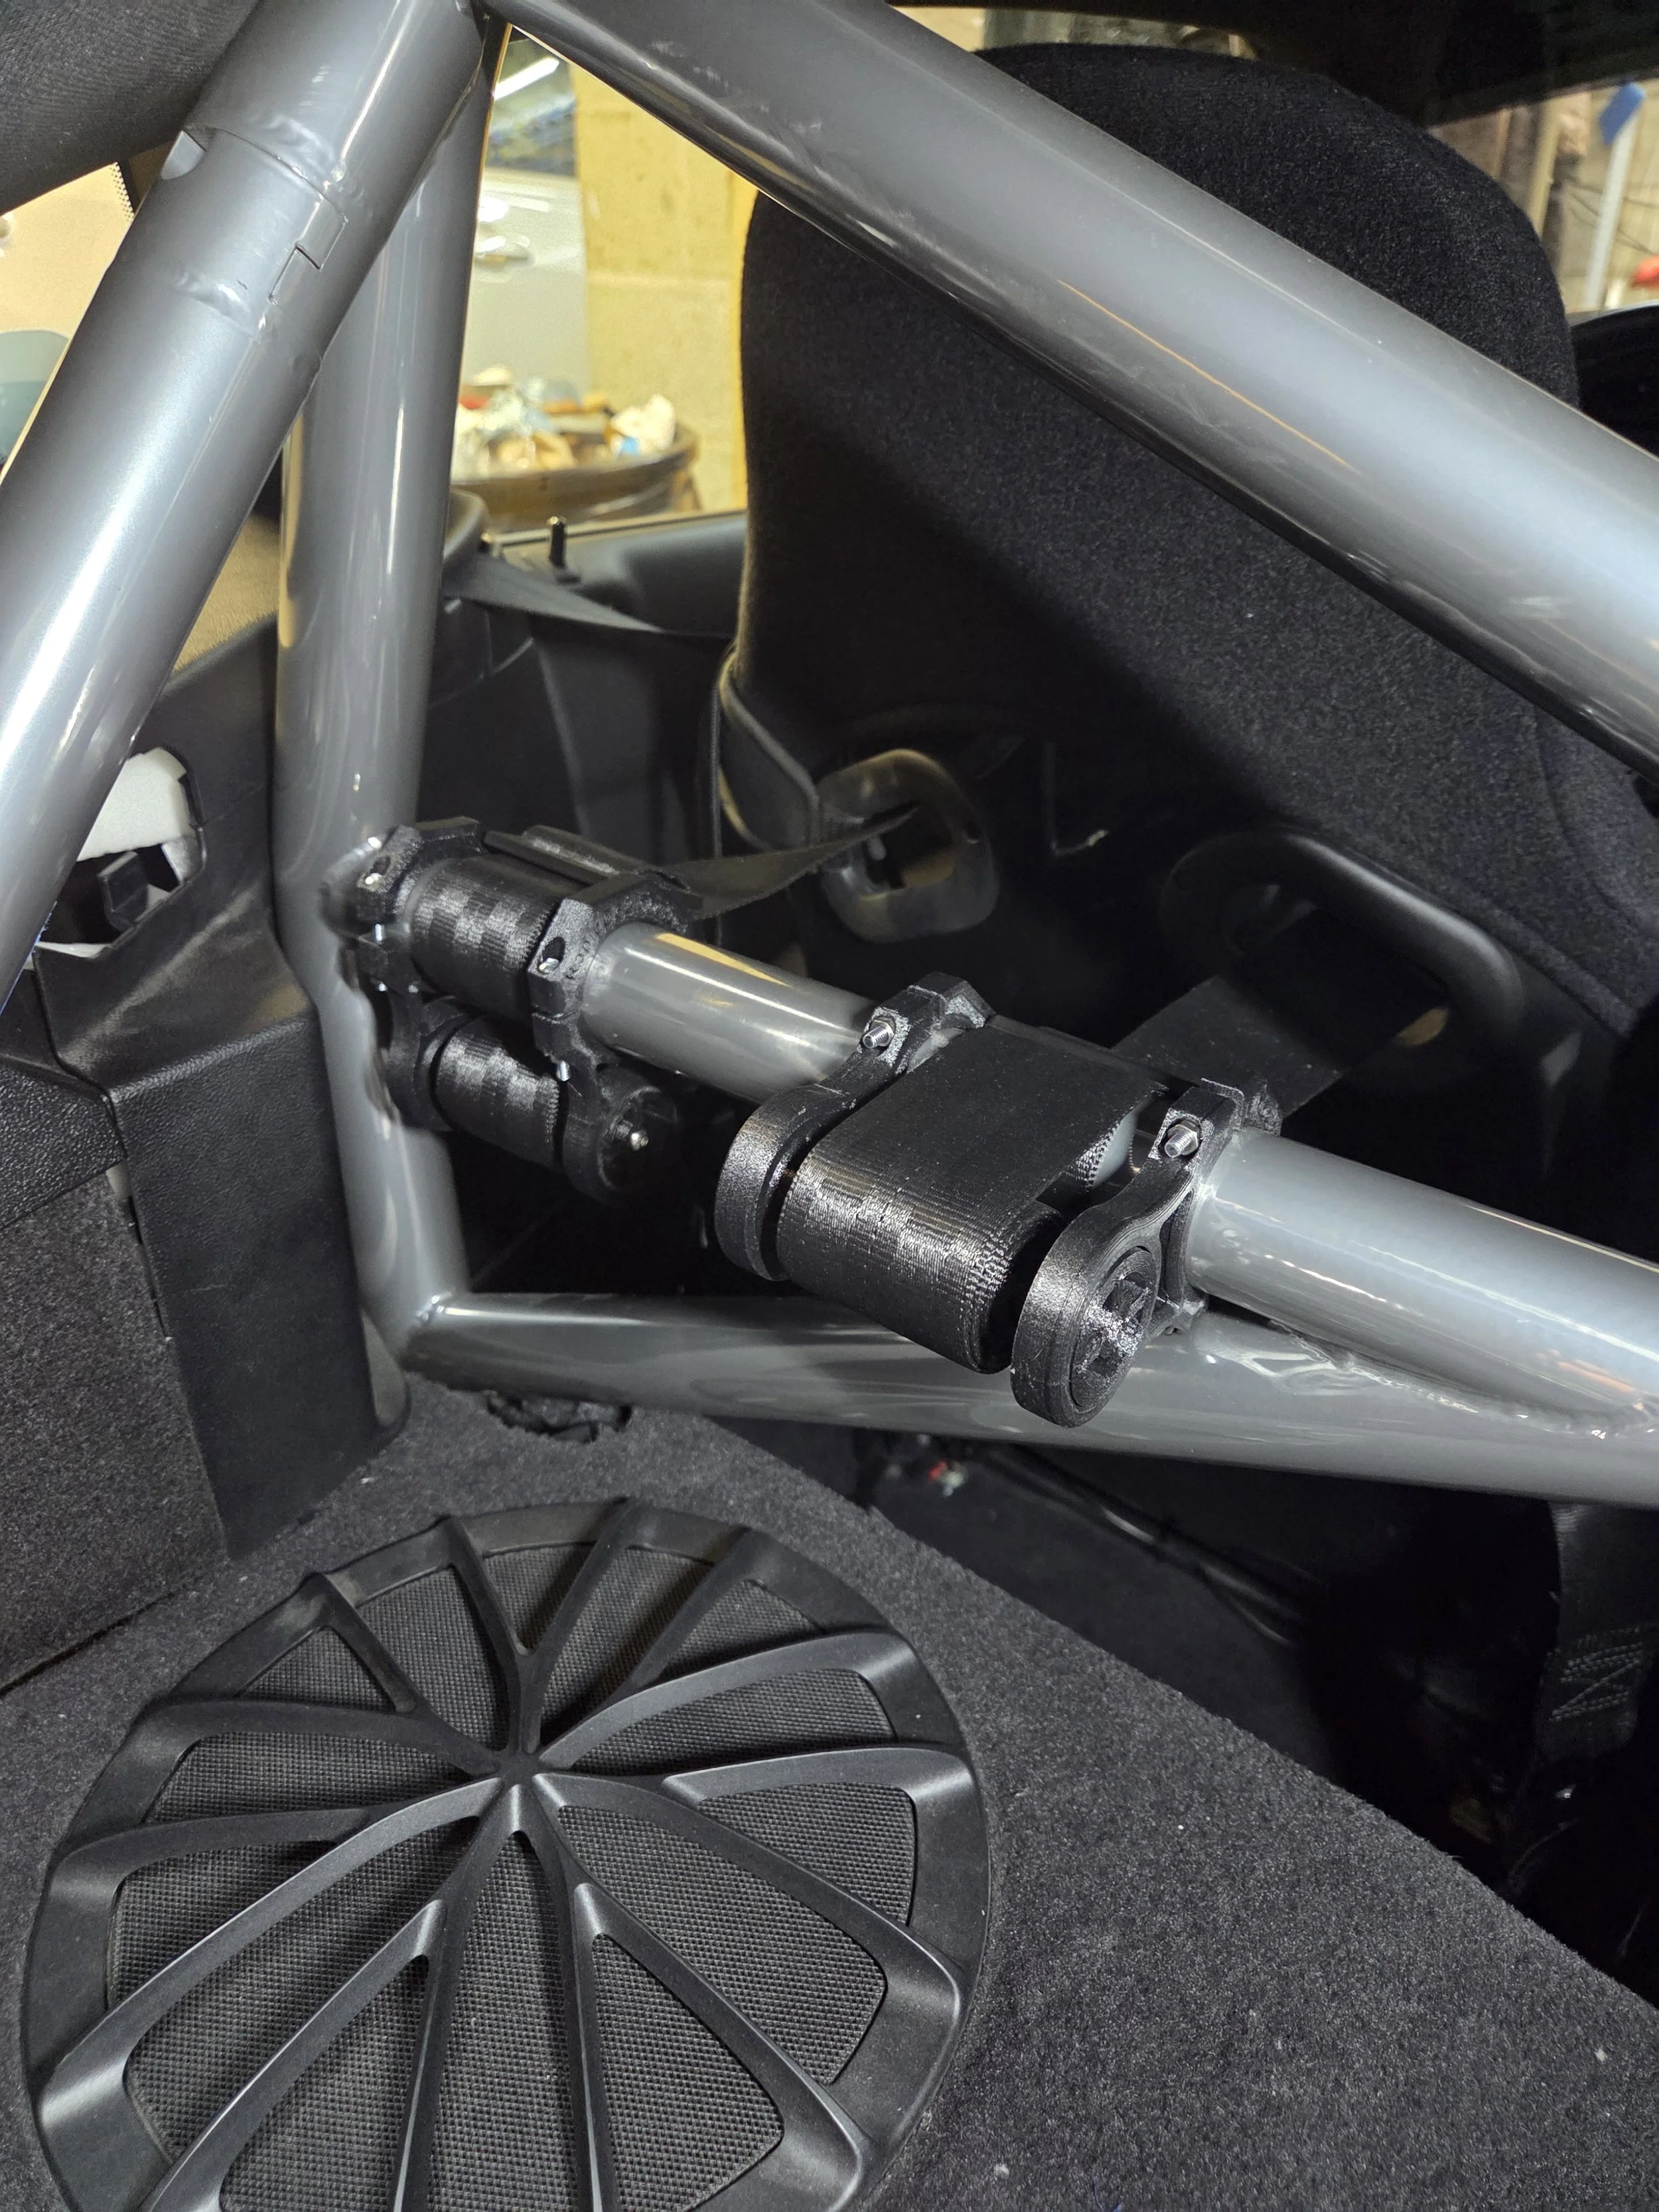
There are a couple options on the market to help clean up excess harness strap after installing them around a harness bar. While the conventional solution would be to just wind up the excess and put a ziptie through, there are a couple options that are more elegant. Unfortunately they are somewhat expensive. My design provides the same functionality while being >$50 cheaper with the ability to adapt multiple materials/colors
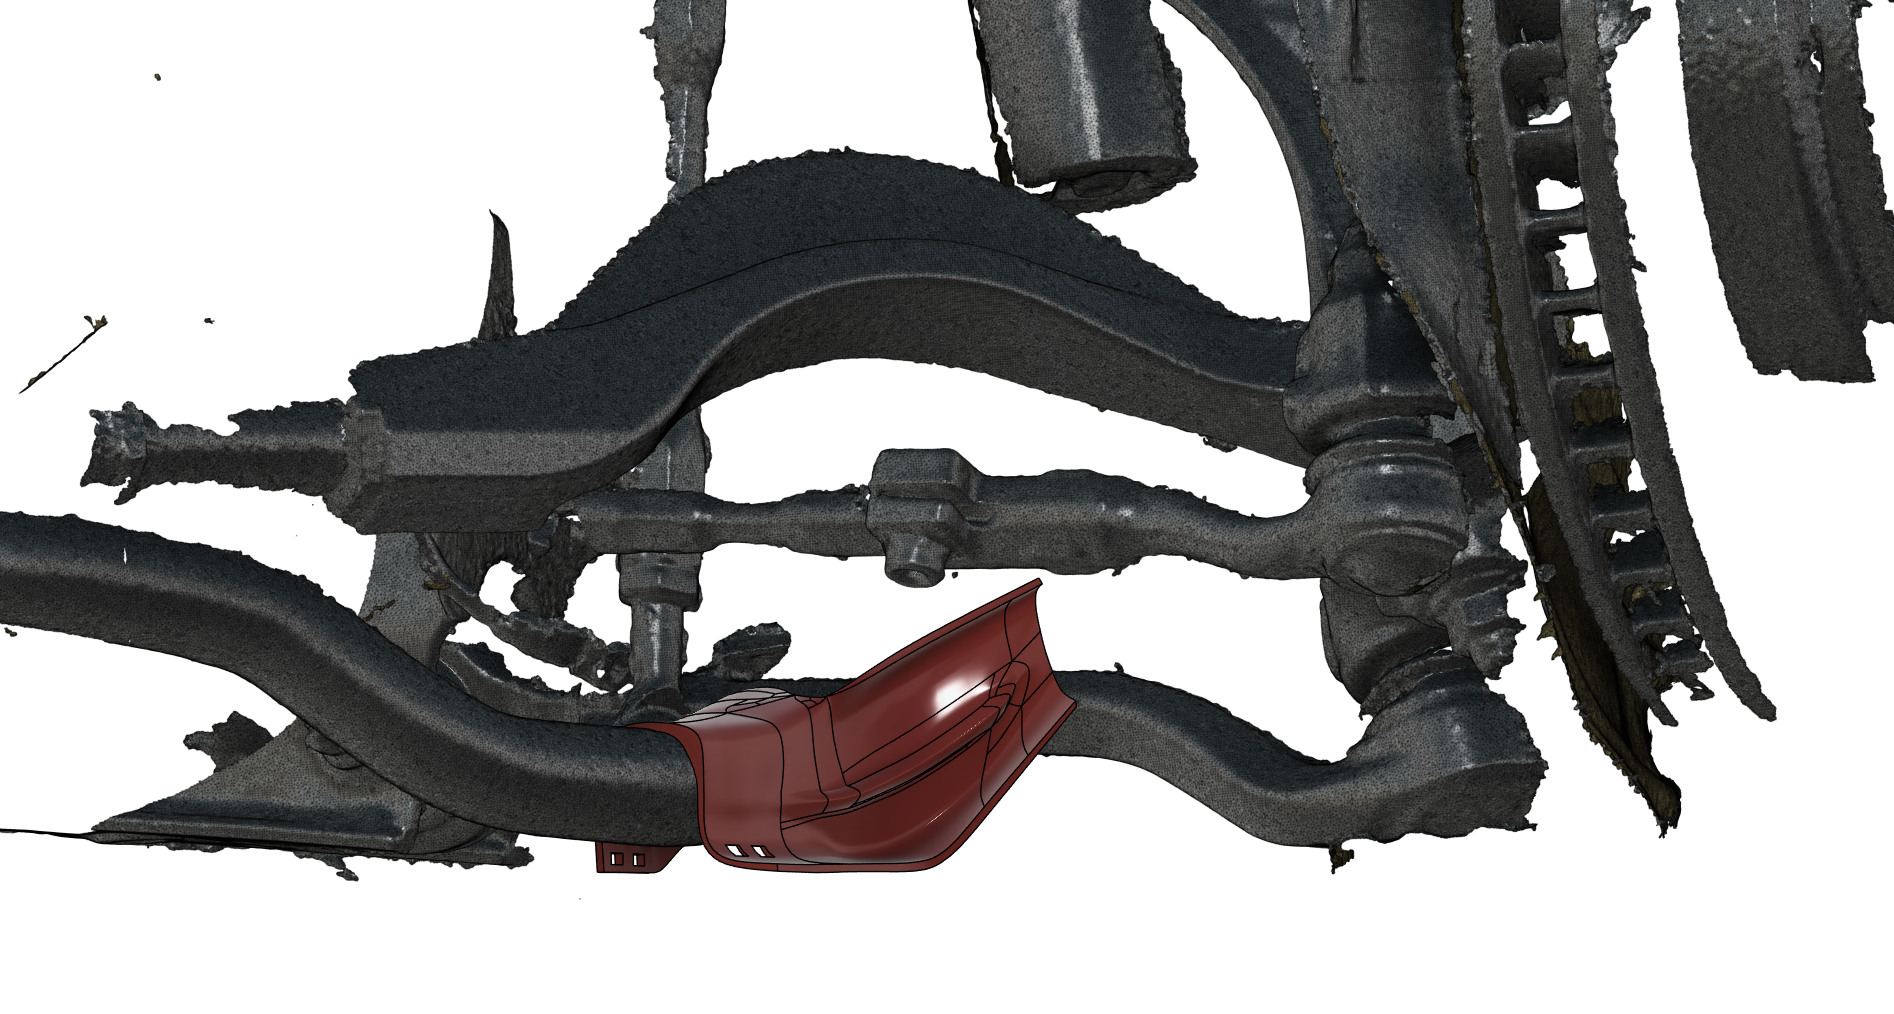
Numerous friends have issues with front brake cooling in the A90 supra chassis. There are options on the market but they utilize the typical corrugated hose which restricts flow due to the boundary layer created from the turbulence of the corrugations of the hose (i.e. a 2.5" ID hose really equates to ~1.5" of flow). A friend suggested we try to attach some sort of scoop to the end of the front swaybar in a similar manner to the brake scoops on 911 GT3s. After a scan of the bar and the front suspension I was able to devise a printed part that can be attached to the end of the swaybar and directs air to the center of the knuckle all without requiring hardware that could fall off if the part were to suffer an impact and possible cause a puncture.
Currently the only front swaybar tested is the AFE bar. Others may work but have not been tested yet.
Easily printable rear spats for the A90 Supra! Comes in 2 parts that will need to be joined via glue/plastic welding.
Note:
Large part Dimensions: 325.5 × 331 × 180.5
Small part Dimensions: 129 × 179 × 27
Total Filament needed: ~500g per side

My friend Kyle came to me asking for a printed duct to sit on top of his current headlight duct to both reduce drag and to help funnel air directly to the intake rather than to a large opening. After receiving a scan from him I was able to sculpt a block off plate I affectionately named the “eye patch” along with a tube to help funnel the air to the intake. due to the slight radius of the inlet, this duct creates a similar phenomenon to a velocity stack. This duct was printed from a PETG-GF filament.
***CURRENTLY A WORK IN PROGRESS***
There are numerous products on the market that offer the ability to display the vehicle’s RPM via LEDs but most of these products utilize the OBD2 protocol. Although this works, there is additional delay, the occupation of the OBD2 port, and a constant power draw that continues even when the vehicle is locked. This power draw also can trigger the vehicle’s alarm to go off as a way to signal the owner that there is a power draw.
I decided to develop my own shiftlight setup by directly listening to the powertrain CANBUS and powering it via a switched source that turns off shortly after the vehicle locks. This would solve all the issues as well as provide a valuable learning experience that directly correlates with my career.
The shiftlight kit is comprised of the following
Controller box - an ESP32C3 paired with a CAN transceiver and a DCDC converter
Shiftlight enclosure - a stick of 8 “neopixel”-style LEDs with different backing plates to suite the user’s placement
Powertrain CANBUS Patch Harness - a patch harness created by a friend to non-destructively tap the vehicle’s PTCANBUS as well as 12v and GND
The code was developed based on open source libraries as well as information from other A90 Supra owners who mapped out the CAN IDs. Utilizing Claude AI, I was able to quickly iterate the codebase until a working prototype could be used. From this point I incorporated a Bluetooth GUI built using RemoteXY such that a user can change the shift point, the brightness, and various other settings for the shiftlights.
Currently, the project requires a bit of in-car testing and should be ready for permanent install within the coming months.
See on-track testing here:
https://youtu.be/yw9KzNKkK94?si=-ZLmwB1crm1J-W1u
*************WORK IN PROGRESS***************
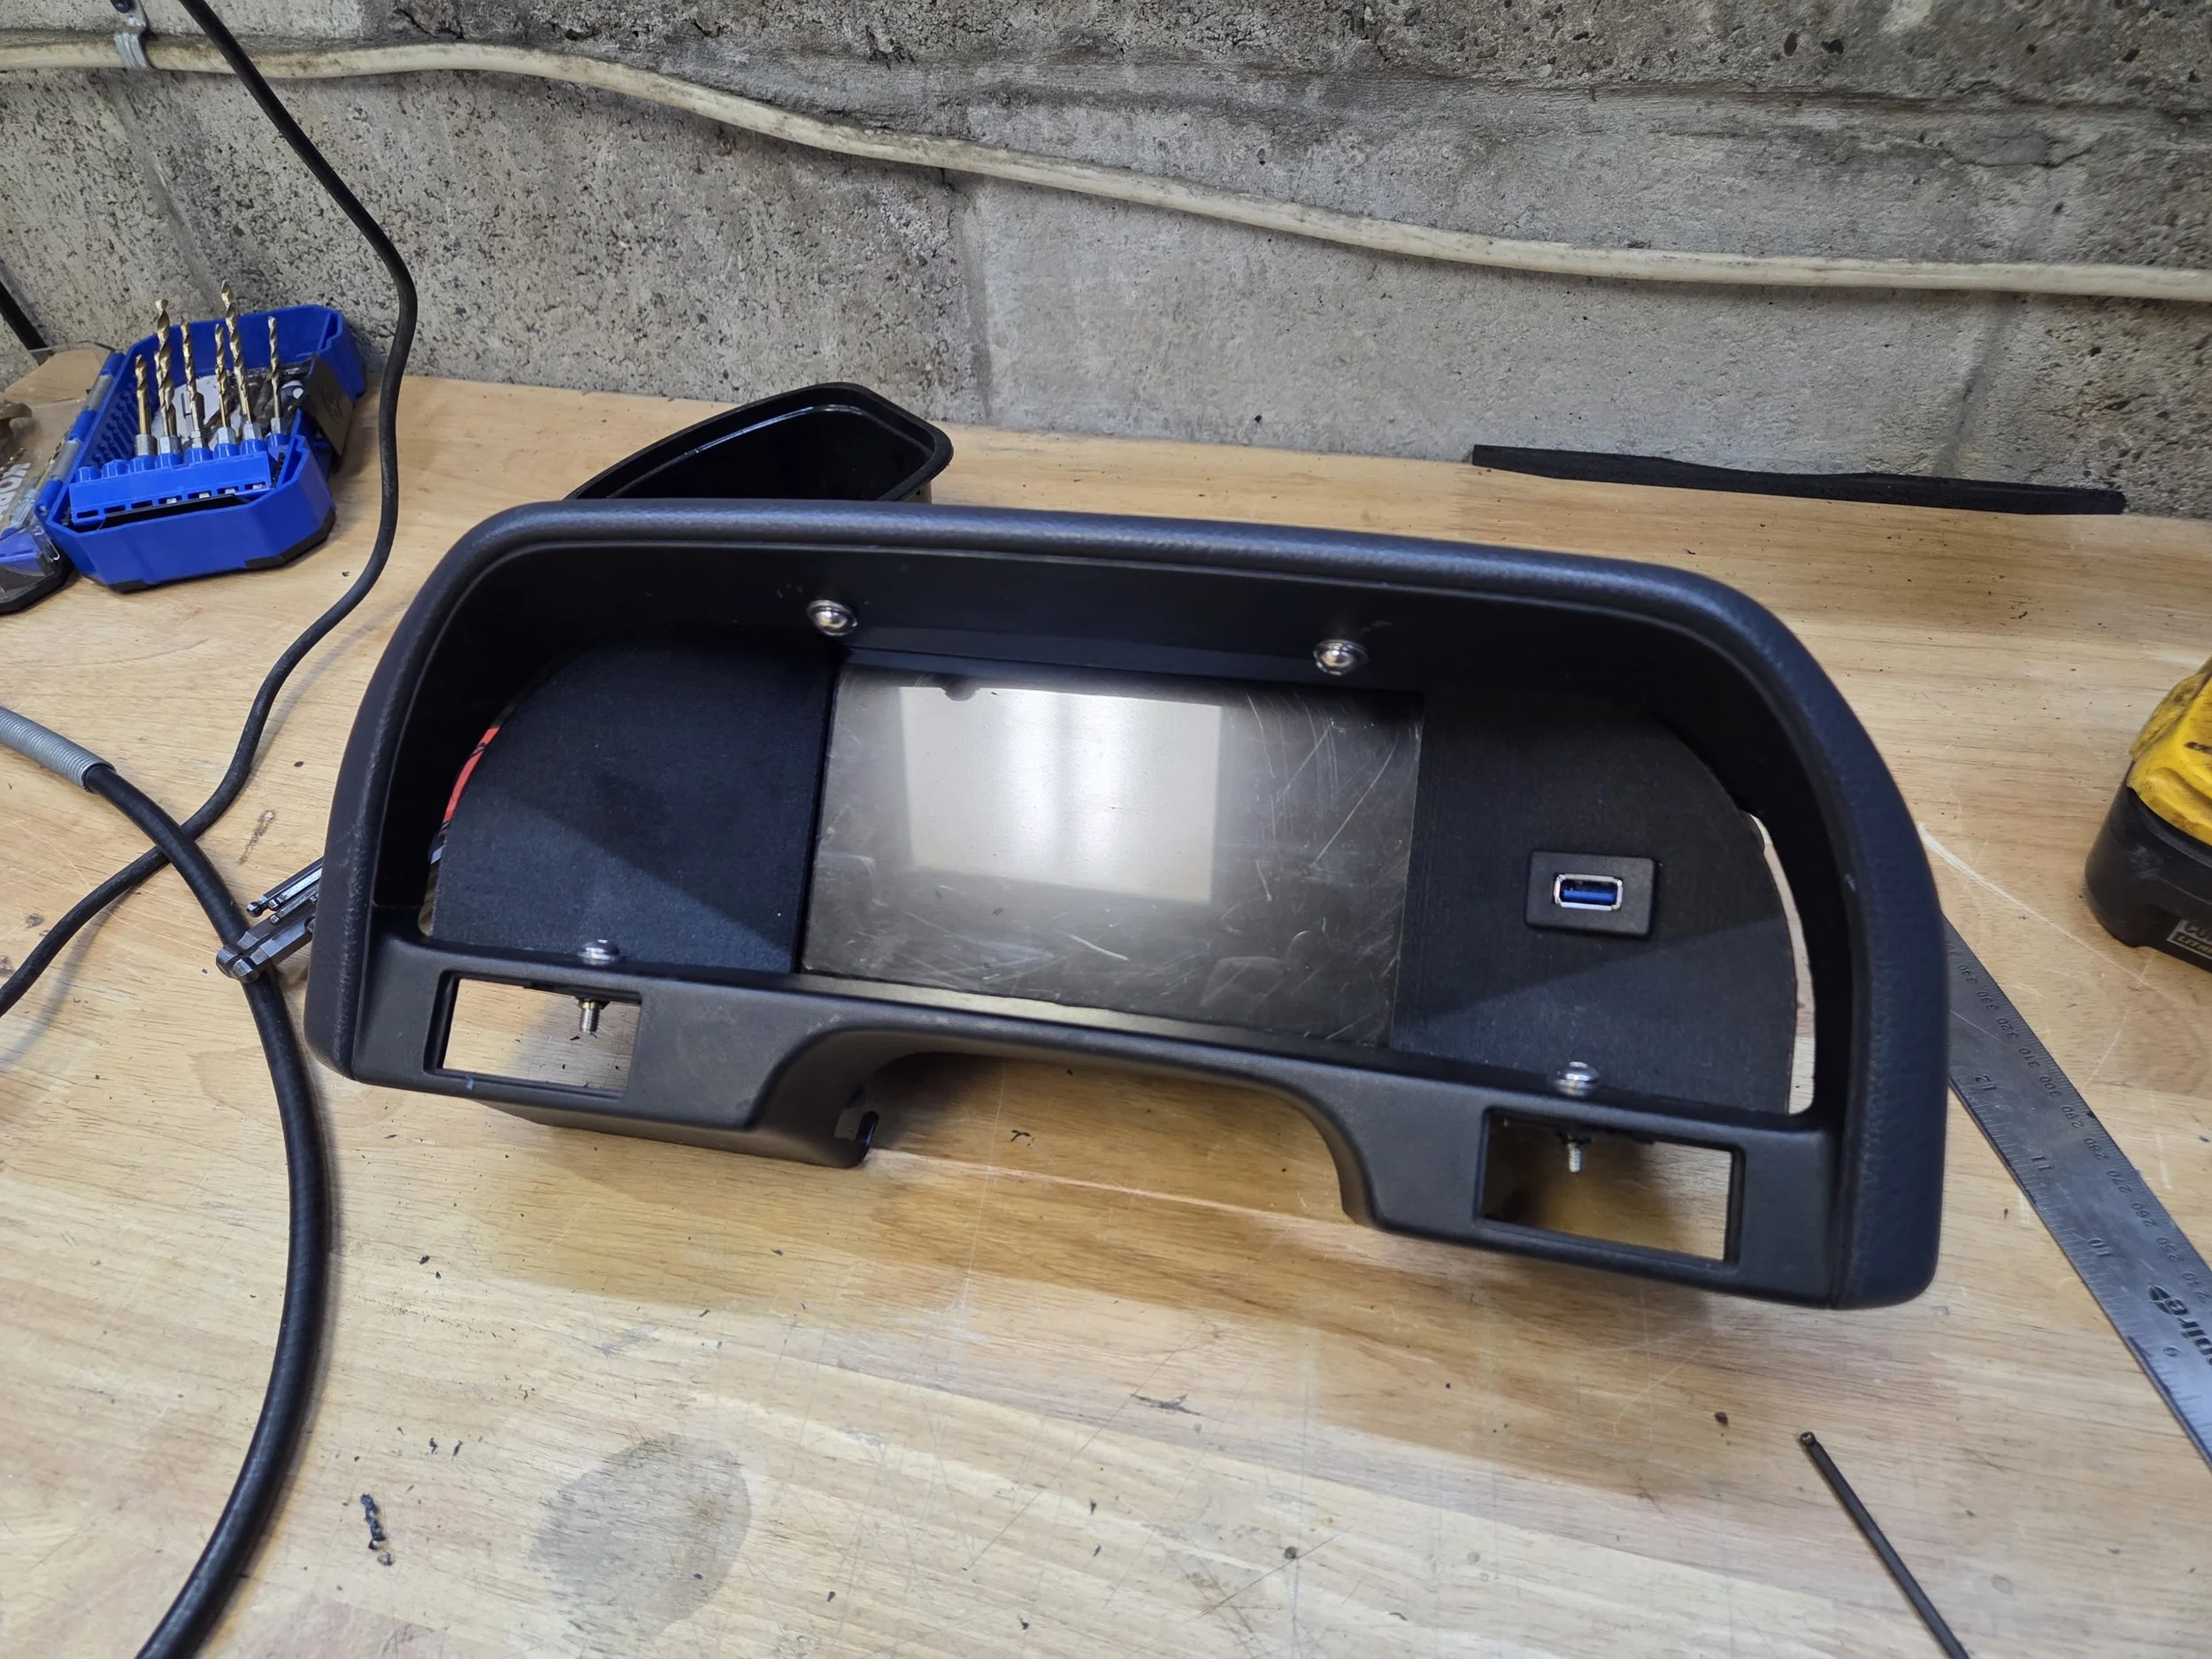
My friend group is in the midst of building a B20B swapped Honda CRX for AutoX and eventually endurance racing. To aid us in seeing vital temperatures, we’ve decided to upgrade the OEM gauge cluster with an open source project called “Hondash”. Utilizing a Raspberry Pi, Raspberry Pi touch screen, and some other small supporting bits, I was able to put together the gauge cluster then design an insert for the Hondash to mount within the OEM gauge cluster hood.
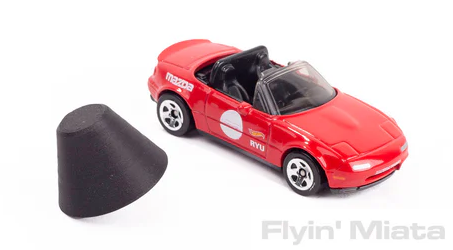
A low-profile "cap" to be used with NC and ND miata chassis to replace the OEM antenna for aesthetic purposes. Due to the bolt used in the construction of the part, AM/FM radio still retains functionality with a decrease in reception capabilities. Currently for sale on Flyin' Miata's website here.
Contact Us
Have a question about a product? Interested in working together or do you have a design in mind? Fill out some info and we will be in touch shortly. We can’t wait to hear from you!